There are lots of great new features in the new iOS 9, and for the last few days I’ve been looking at a feature that I think will be really useful for lawyers and their clients: the new Markup feature in Mail in iOS 9. This feature gives the Mail app the built-in ability to perform simple annotations on documents, including adding a signature to a document. Thus, it is now quick and easy to circle some key parts of a document that one of your colleagues or opposing counsel needs to address. It is also easy for you to emphasize a part of a document for your client to review. And because it is simple to add a signature in a document, you can sign something that someone else sent you without leaving the Mail app.
Selecting a file to markup
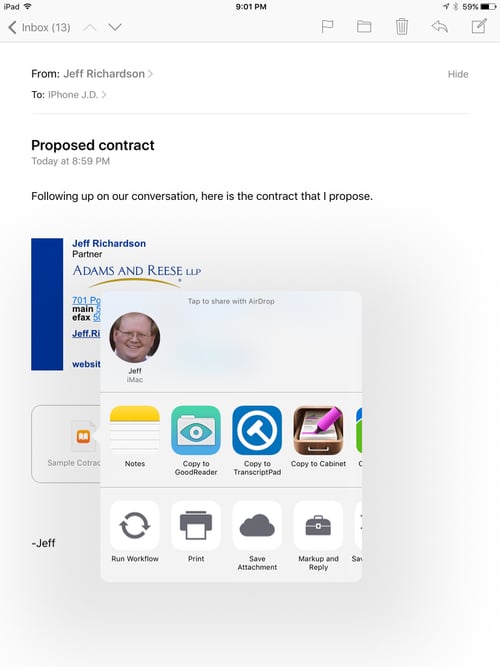
I suspect that this feature will be most useful to me when someone sends me a PDF file and I want to reply with an annotated version of the document. It is now very easy to do this on an iPad or an iPhone. (The below pictures are on an iPad.) Just hold down your finger on the PDF attachment, and look at the bottom row of options. One of the options on that row is now Markup and Reply; it has an icon that looks like a toolbox. Tap that icon, and the Mail app will start a reply email (note — in my tests it started a Reply All, not just a Reply to the original sender) with the documents attached and then will open up the attachment so that you can annotate it.
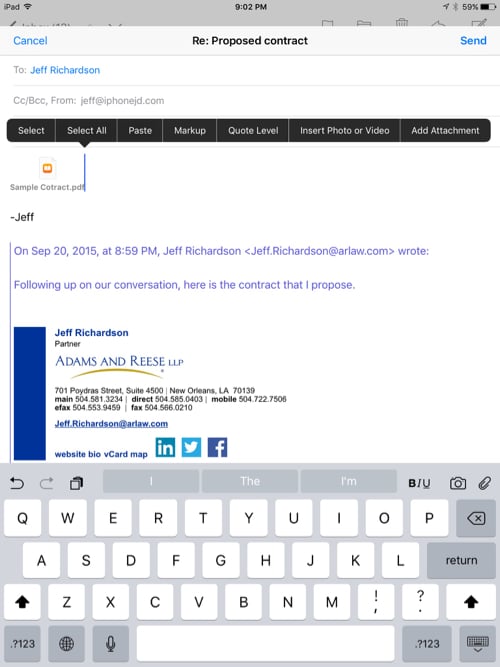
Alternatively, if you already have a PDF attachment to an email that you are working on, just hold down on the document, and in the pop-up menu you will see an option called Markup. Looks like it is the fourth option.
In this post, I focus on annotating PDF files because we use them so much as lawyers, but note that the Markup feature also works with images.
Annotating the document
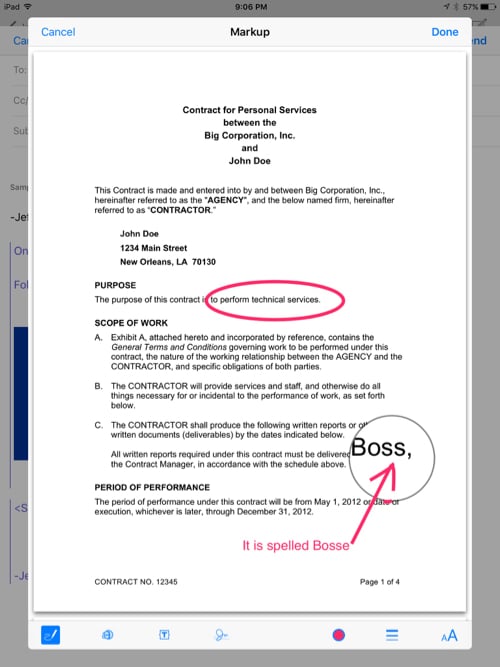
The next step is to annotate. The new Markup feature only includes basic annotation tools. You cannot highlight, add stamps, etc. Instead, your options are limited to freehand drawing, typing text or creating a zoom circle.
To start drawing on a document, select the pen tool at the bottom left. You can then draw anywhere on the document.
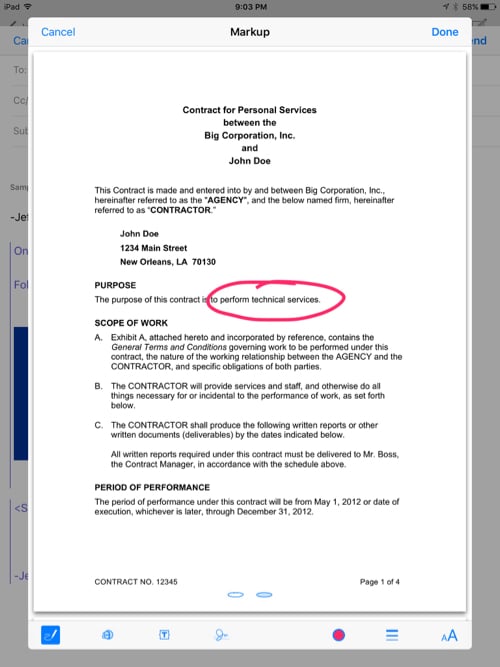
You can change the color of the ink by pressing the circle icon, third from the right at the bottom of the screen. You can change the size of the pen by tapping the icon with the three lines.
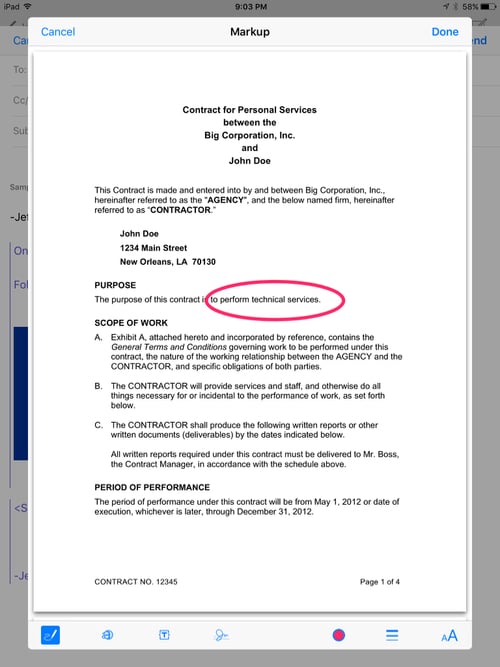
If you draw something that looks like a shape (a circle, ellipses, square, rectangle, line, triangle), after you draw you will see an option at the bottom of the screen to leave it the way that you drew it or to change it to a perfect shape. That option is shown in the prior image, and this next image shows what a corrected shape looks like:
I wish that there was an option to turn a line into an arrow by adding a triangle head to one end of it. For now, it looks like you need to draw your own arrows.
UPDATE: Another lawyer at my firm just showed me that you can create arrows. Just draw something that looks close to an arrow, in a single stroke, and then at the bottom of the screen tap the arrow option to clean it up. My error was making a line, then lifting my finger, then drawing the triangle on the end of the line with a second stroke. You instead need to keep your finger on the screen while you are making both the line and the head of the arrow.
When the pen tool is turned on (blue box around the pen icon), you can draw on the screen. When the pen tool is turned off, you can tap on any annotation that you have made and choose to delete it, edit it or duplicate it.
The second tool is a magnification loupe. It creates a circle that zooms in on a part of the document. Both the size of the circle and the magnification of the zoom are adjustable. This gives you the ability to zoom into a part of the document.
The third tool is the text tool. It works as you would expect — tap a part of a document and then write some words. You can adjust the color, and you can also adjust the font by tapping the icon at the bottom right.
Signatures
Markup also makes it fast and easy to add signatures to document. Just tap the fourth icon at the bottom. The first time you do so, you will be prompted to enter your signature.
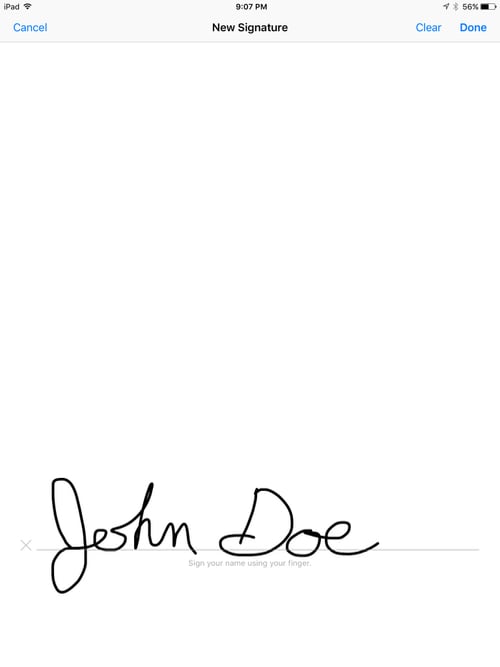
You can then add the signature to your document. Drag the four corners of the signature to adjust the size, and drag the signature to the right location.
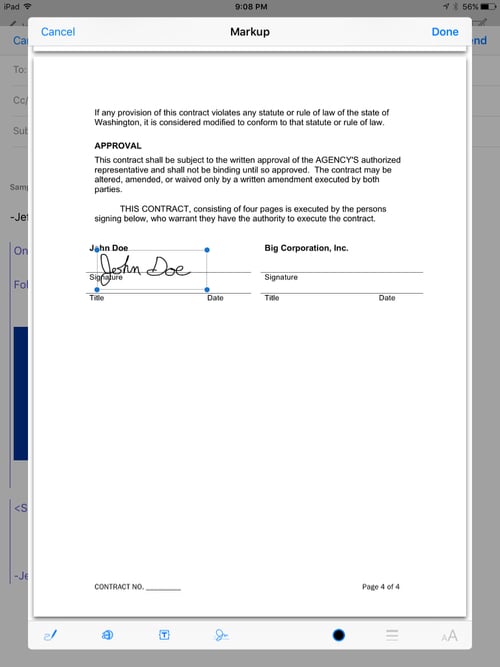
After you enter your signature once, it is stored and shared to your other devices. Thus, you might want to sign the first time on your iPad, taking advantage of the larger screen and perhaps even using a stylus to create a nice signature, and then you can easily use that same signature in the future on your iPad or iPhone just by tapping on it after you press the signature icon. You can create and store multiple signatures.
When you are done with all of your annotations, just tap Done. Then you can send your email with the annotated file attached.
Usefulness of Markup
The Markup feature doesn’t do anything that you cannot already do with third-party apps. And third-party apps offer more annotation features, such as highlighting. And many third party apps, such as GoodReader, let you flatten a file before you send it so that the annotations become a more permanent part of the document. Annotations that you create using the Markup feature can be deleted, edited or moved around by the person to whom you send the annotated document.
Having said that, it is nice to have an option built-in to Mail because it is so much faster to use. If you just want to quickly circle something in a document, Markup can do it well, and do it fast.
I can also see Markup being useful if you want to send a document to a client and you want them to circle something or sign the document. Plus, you can send a document to anyone else using an iPhone or iPad and ask them to sign it without needing to worry about whether they have a third party app installed that can perform that function. They do need to be running iOS 9, which is currently brand new, but eventually most people will be on iOS 9.


Wow that’s neat! I haven’t looked at many apps/online software like docusign etc so I’d be curious to know how Markup and his compares.
Can this feature, mark up more than 1 attachment?
I think that you have to just work with one document at a time.
-Jeff
Is there a way to erase?
I don’t think so. You can undo if that helps.
-Jeff
Are you able to save a PDF document that you have marked up for future use?
Markup and reply doesn’t work for me anymore since I updated to iOS 10. Has this happened to anyone else? Any suggestions? I love this feature and want it back. 🙁
Me too Shannon. Markup signatures move to the bottom right of the document with iOS – Need help!!!!
Yes, you can save the doc. My siblings and I are owners of a property we are selling. We all live in different cities. The papers were sent to me, I sign and sent to my brother, he adds his signature and sent to my sister, she signs and sent back me and I save it in my folder – then sent it on to the notary.
I love technology – when it works. See my comment below!!