When taking a deposition of an adverse witness, I sometimes want to pin down a witness on exactly where he was standing or where some other events took place. This can be difficult with simple questions and answers because even if the witness gives one explanation for where things took place, mere words may give the witness some wiggle room to later say that it happened differently. A good solution is to be armed with a picture of the area so that the witness can identify exactly where, in the picture, events took place. Of course, in a discovery deposition, you may not always know beforehand what the witness will say, so it can be difficult to arrive armed with every possible picture from every possible angle.
Virginia prosecutor Rob Dean recently wrote a useful post on WALKINGOFFICE, his blog for lawyers who use an iPad. I give Dean full credit for this idea, I have simply expanded upon it a bit in this post. If your witness describes an event that took place on a public street, you can use the built-in Maps app on your iPad to plug in the address or the intersection at issue. Let’s say, for example, that a witness tells me that an event took place across the street from Jackson Square in New Orleans. If I have a street address, I can plug that into the Maps app. Or if I have a popular place name, such as “Jackson Square” I can plug that in.

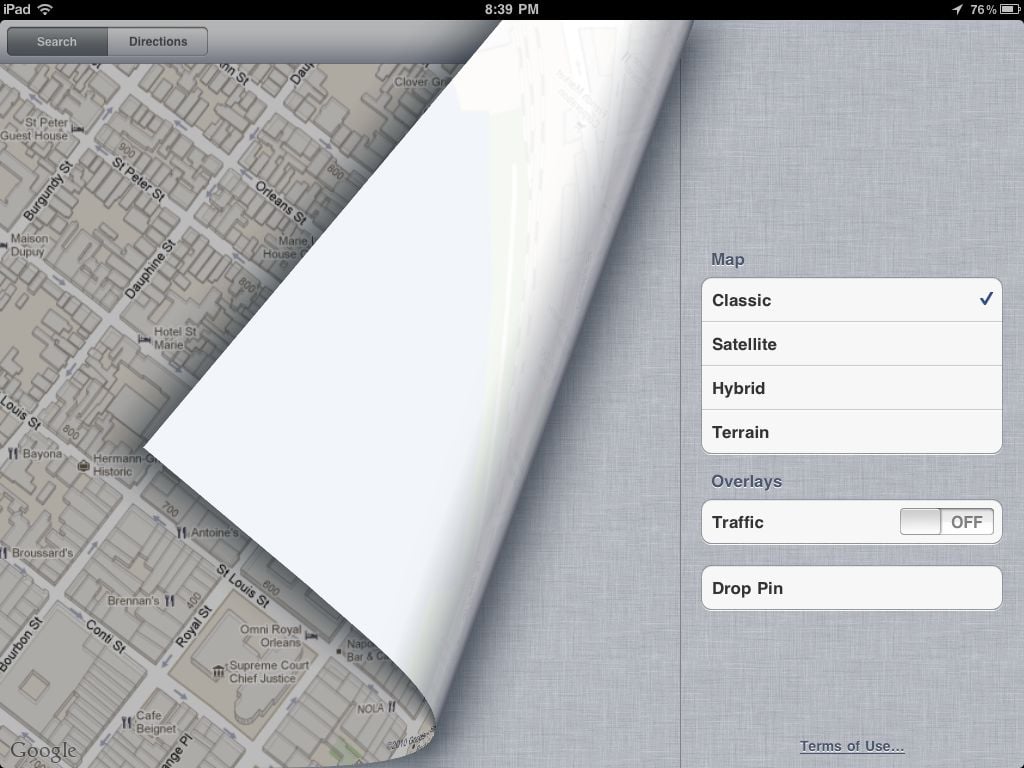
If the location on the map has an icon next to the pin (a white figure in an orange circle) then I can tap the icon to enter the Street View mode to get a street level view of the location. If not, I can tap the bottom right corner of the screen to choose “Drop Pin” and then I can tap and hold the pin to drag it to a street, where Street View will work.


Now I just tap the Street View icon and show the image to the witness. I suspect that most of you have used this feature before and you know how easy it is to virtually look around in 360º and tap on the white arrows to move up and down the street. Get your witness to identify the spot and/or the angle that corresponds to his story on where the event took place. Once you have it on your screen, take a screenshot by quickly pressing and releasing the Sleep/Wake and Home buttons at the same time. The screen will flash to let you know the screenshot was taken, and the screenshot is added to your iPad’s Camera Roll.
The iPad always takes screenshots in the Portrait mode. If that is the way that you were holding your iPad, then you can skip the next step. But most likely, such as in my examples above, you had your iPad in the landscape position, so you will next want to rotate the image 90º. Unfortunately, the Photos app doesn’t currently let you rotate an image, but there are many third party apps that do. For example, the free Adobe Photoshop Express app will let you manipulate an image in lots of different ways. Launch the app, select the screenshot that you just took from your Camera Roll on the iPad, and tap the first icon at the bottom of the screen to get the option to Rotate:

If you want to be fancy you can even quickly adjust the exposure, contrast, etc. but for these purposes that probably isn’t necessary unless the Street View picture from Google is particularly poor. When you are done, tap Save at the top.
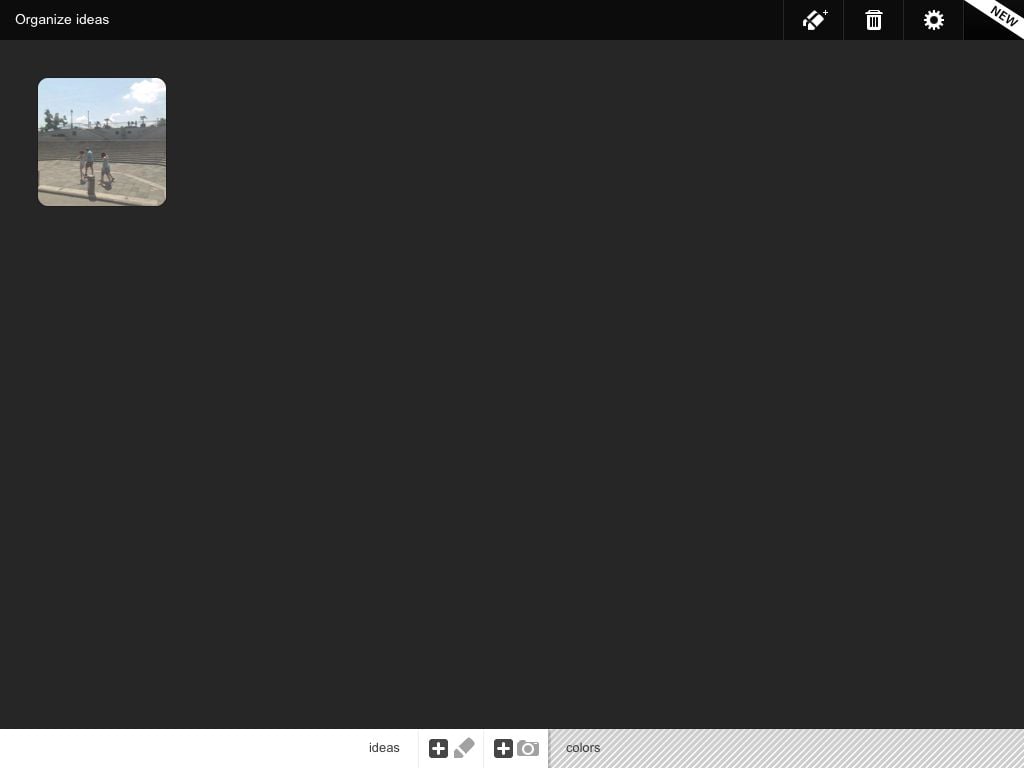
Now that the image is in your Camera Roll in the correct orientation, you can have the witness identify locations by drawing right on the picture. I recommend using a $5.99 app called Adobe Ideas. Launch the app and tap the plus sign at the bottom of the screen that is next to a picture of a camera. This lets you choose a picture from your Camera Roll as a background image:

Tap the image and it opens up in the app. Along the left side you can select a pen, eraser and a hand (to move around the image or pinch to zoom). Change the pen to whatever color you want, preferably one that will have a lot of contrast to the background such as a bright yellow. If necessary, adjust the size of your brush.

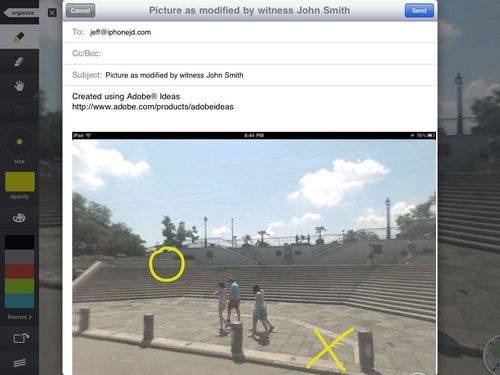
Now, ask the witness to either use his finger or a stylus that you provide to indicate exactly where events took place. For example, the witness might put an X where he was standing and a circle where the other party was standing. Don’t worry if a mistake is made; you can undo and redo, and you can use the eraser took if you need to change a bunch. You are drawing in a separate layer on top of the picture, so you don’t have to worry about erasing or modifying the underlying picture.

Make sure your witness identifies on the record what his markings mean (such as the X and the O) and then you will have a very specific record of where the witness was standing and/or where the significant events took place, even though you didn’t come to the deposition with a picture for him to use. In fact, in some ways this is better than photograph. The iPad screen is large, so unless you brought an 8×10 picture, this is bigger. Also, drawing on a photograph is very difficult unless you have the right pens with you, but using an iPad app like Adobe Ideas to draw on a picture is simple when you select the right color. Once done, you can tap the share button at the bottom right to send the picture via e-mail to the court reporter and all counsel of record, and/or you can save the modified picture to an album on your iPad.


If you want the witness to include even more information, you can tap the hand button and then pinch to zoom out. This reveals extra space that a witness might use to indicate some other information in the margins around the picture:

When Adobe Ideas sends the image, it puts it in PDF format and automatically crops it to just include the areas where you have drawn. Click here if you want to download the PDF image that I just created to see what it looks like.
For all of this to work using Maps and Google Street View, the event must have taken place on or near a public street. Sometimes, this will be exactly what you want. For example, in a deposition in a car accident case, you might position the view to match what a driver would have seen as he is approaching an intersection.
Keep in mind you can also create the underlying image in many other ways. For example, the Bing Maps service from Microsoft offers something called Streetside, which is Bing’s version of Google Street View. Unfortunately, as of now, Streetside doesn’t work on an iPad (although you can use it on your computer if you want to create the picture before your deposition), but you can use the free Bing app to use the Bird’s Eye view in Bing Maps, a mode that does not exist in Google Maps. Depending upon what you want a witness to describe, the Bird’s Eye view might be even better from a top down view that you get in a traditional map. For example, here is a Bird’s Eye view of the same location I showed above.

Once again, you can take a screenshot and then use Adobe Ideas or another graphics app to have the witness mark specific landmarks. A nice feature of the Bing app is that you don’t even have to type something; you can just tap the microphone icon at the top and say something, such as in this example “Jackson Square” and that location will pop right up in the map.
Or you might even use a photograph that you did take yourself before the deposition. Instead of printing out the picture, just put it on your iPad and load it up in the Adobe Ideas app before your deposition starts so that you can quickly have the witness draw on the picture. Perhaps you might use a picture of the equipment that malfunctioned and ask the witness to mark exactly where the malfunction took place.
A picture can be worth a thousand words. A picture that you use with a witness to exactly identify where he says something took place can be much more valuable than that when you later want to impeach the witness at trial, showing that the events could not possibly have unfolded as he previously testified. Thanks to the iPad, you have the tools to create a photograph with markings right there in the deposition, which may end up being the reason that you win your case. (And thanks again to Rob Dean for his original post with this idea.)
Click here for Adobe Photoshop Express (free): 


Great article, thanks very much. I’m a bit ashamed that i don’t think of these kind of things on my own. I certainly could have used this technique in a deposition two weeks ago. I’m looking forward to the next opportunity. BTW, Adobe Ideas may be free in NOLA but it’s 6 bucks in the rest of the world.
[Jeff responds: Adobe Ideas was free when I got it last year, but I see it is now $5.99. I corrected the post, and thanks for alerting me.]
Exhibit A ($9.99) is another good option. It is a fully featured presentation app, so you can do the rotating and pen markings you describe, and then save the marked up exhibit to you case file. Plus, you can immediately, or even contemporaneously, show the exhibit on a large screen while the witness is being questioned and is marking on the exhibit. You can email the finished exhibit to opposing counsel and the court reporter right from Exhibit A as a way or attaching the exhibit to the transcript.
Link to Exhibit A: http://itunes.apple.com/us/app/exhibit-a/id392621180?mt=8
Thanks for sharing this. I just downloaded Photoshop Express!
Although it wasn’t done with an iPad, I was involved in a trial recently (we won), in which we used Google Earth images and graphic overlays (using Photoshop) such as you’ve shown here. It actually resulted in a jury instruction, which was very favorable in our case. I have an article, which explains how we did it.
Here’s the link: http://trial-technology.blogspot.com/2010/02/anatamomy-of-award-winning-trial.html
Many thanks for this post! Map application on your iPad would be that perfect weaponry in your hand to compel your witness to identify and stick to a specific location, where the event actually took place, this would leave little room for confusion and it would be hard for the witness to retract the statement later on.